Friday, December 12, 2014

Pop up box card - Moving together


Hello friends !!! 
today I have a pop up box to share with you all.
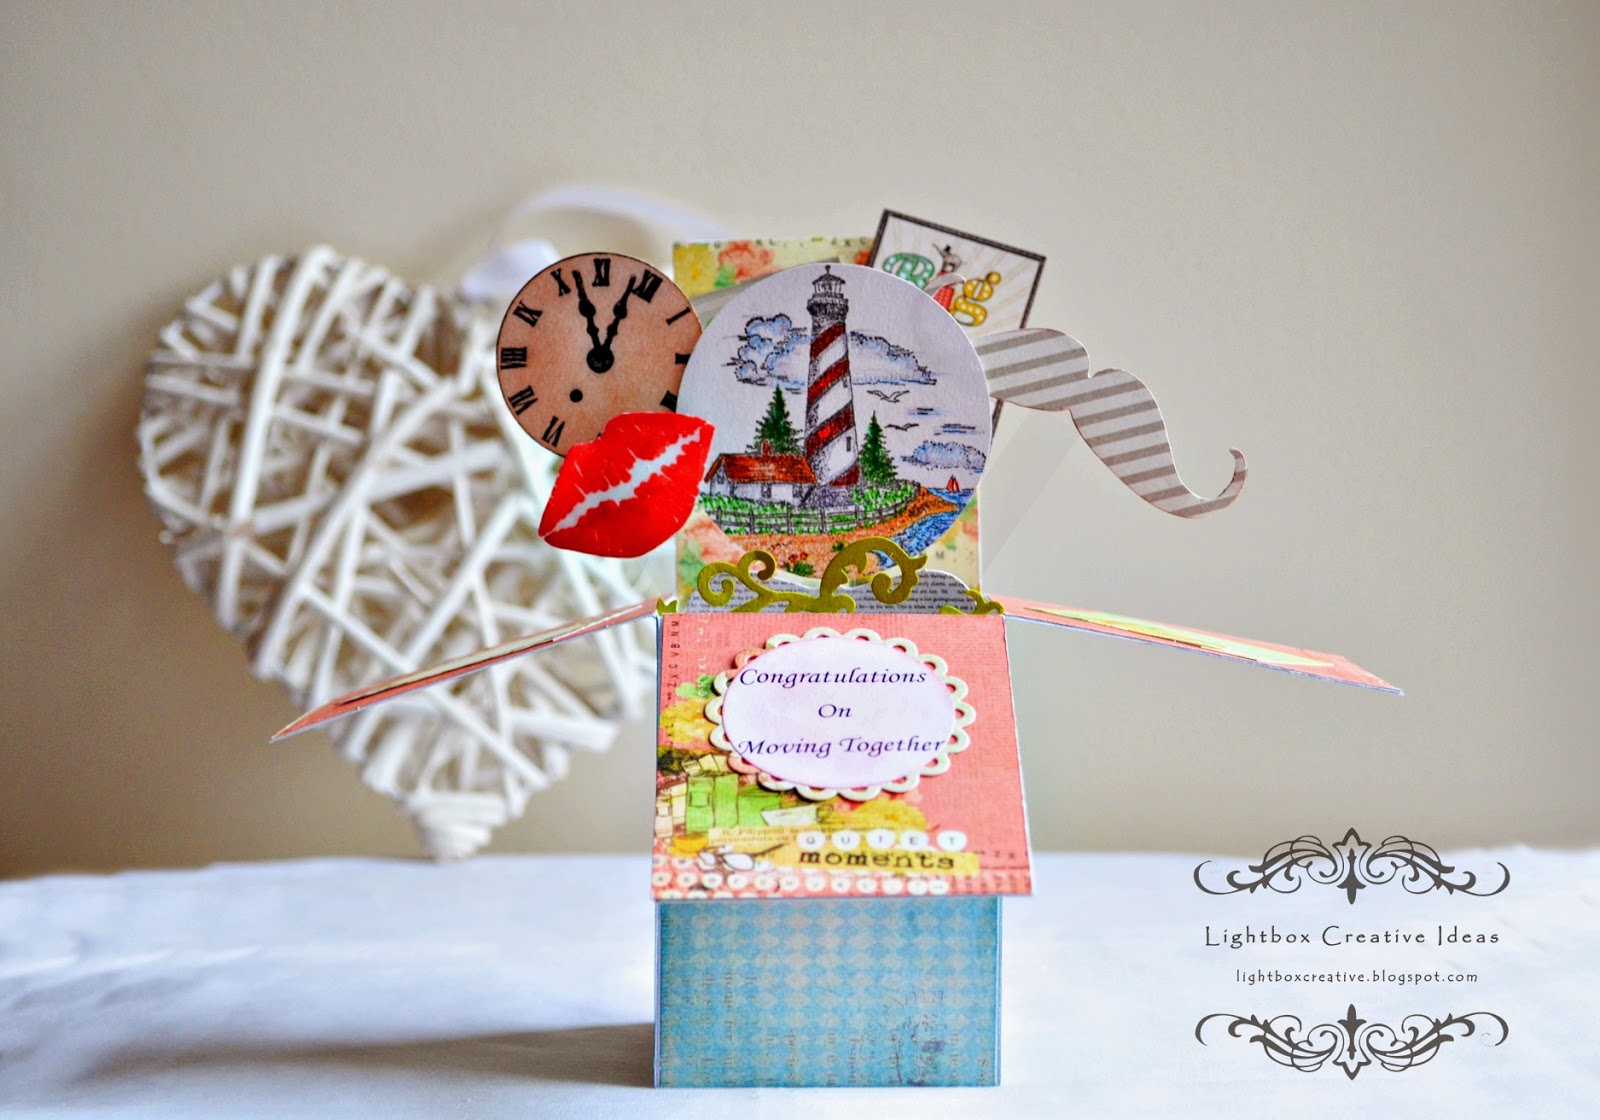
This one was made on order for a couple who had moved in together . 
So here is my card 

These pop up box cards are really a rage right now in the crafting community.
And so far I feel that people love the surprise of everything popping out like this.
I don’t know who invented this genius card type but hats off to that person!

I added all my elements according to the theme.
I hand colored the main image of this lovely light house and house by the beach.
Hand colored the lips with Promarkers and then added some glossy accents to make it look shiny.
The mustache and the clock they are cut with Sizzix-thinlits-die-set-top-hats-mustaches
Here are some close ups


And here is my sentiment
Which is printed and then cut out in a circle J
 I have used a spellbinders die under it for the ornate effect.
I have my full post on the same card at Itsy bitsy blog if you would like to check it out !

Thanks!!!
Happy holidays!


 Other supplies : 
  • Cardstock- Hobbycraft 
  • Promarkers - Ruby , Green
  • Distress inks 
  • Luna water color pencils .
  • My minds eye and crate paper (Accents at the back)
  • Glossy accents 

Friday, December 5, 2014

Christmas Tags

Hello my lovely friends !!
Over at the BGC blog we are playing for the Sparkly Christmas/ new year challenge
Which is so apt for the season :)
December is my favorite month because its so festive and nice !
Specially here in my city :) Its so amazing 

So anyway I made a tag set for the challenge. 
Here are some close ups of the individual tags.

So i hope you liked my creation and are inspired to participate in this 
fairly simple challenge that's running a MONTH long this time. 
Please join the challenge  HERE

 Merry Christmas
Thankyou !

Challenges :
Simon Says Challenges-wednesdaychallenge 
bearlymine-challenges- Dec challenge
paper take weekly
The card concept  (The first thing i noticed were the colors !! So i went for the winter theme of christmas with the Greens blues and little bit of red ! I think this can be classified as a freestyle or shabby chic)

Sunday, November 30, 2014

masculine pop up box card

Hello eveyone !
I hope you all are having fun this weekend ! I certainly have been doing some good amount of crafting this whole month. Today i have a popup card to share with you :)
These pop up box cards are so wonderful! They fold flat and you can just make any theme you like ! 
1DSC_0033
I made this one for the Pretty paper studio blog you can hop over there to see how i made this card. 
I confess that i find it really hard to do anything masculine so i decided to challenge myself this time.
Here are some close ups of the final card
1DSC_0038
1DSC_00411DSC_00421DSC_0044

Friday, November 14, 2014

Be merry embossed card

Hiya friends !
Its another friday and i am sharing another christmas inspiration at the Itsybitsy blog. 

Do check out my full post HERE

Monday, November 10, 2014

Fall is here - card

Hello my lovely friends !
 Inspired by the lovely Fall season we have our current challenge at BGC this fortnight !
Its such a beautiful sight all over my side of the globe ! 
So here is my creation for the theme 
 My card is inspired from the exploring i did this month in my own city !
You can see the resemblance of the pebbles in the texture i created using prima texture paste - black sand. 
Loveeeeeee it ! The new Finnabair line is just so amazing ! 
I basically created the leaves from cardstock and made them look realistic with some painting and inking on it.
I love giving my elements the lift by using double tape ! 
I seriously think adding dimentions to your card always creates the much needed Drama :) 
 Initially i was a bit stuck with the theme but after a nature walk i really got inspired !
So thats about it for today !
Thanks for stopping by ! 
Hugs 
PJ 


 Other supplies : 
  • Cardstock- Hobbycraft
  • Memento ink pads - Morocco , Potters clay
  • Distress ink pad - Mustard seed
  • Distress ink applicator
  • Handmade leaves - Mapel 
  • Gold distress glitter 
  • Foam dots 
  • Stencil - Heidi swapp 
  • Stamp - Inkadinkado (Both bird and sentiment)

Sunday, November 2, 2014

You are my Fave!!


Poojatute12
Hi friends ! Its Pooja back on the blog!  
I have been so busy with all the DT work that i couldnt post on time on my own blog !!! 
Plus I just started to work on a new venture which is taking so much of my time ..... 
hufff..... anyway ! I have a fun and colorful card for you this time.
 
Poojatute10 
I made this for the PPS blog as my DT inspiration for our teachers apprication challenge. 
I have played with distress ink mini's and some texture paste to create this wonderful watercolor look !
Here is the full tute on the background.  

Thanks ! 
see you soon 

Saturday, October 4, 2014

Tilda and edwin Hug!

Hello friends !
I have a quick card to share that i made for the BGC design team. 
This Time we want to see your human character stamps ! 
So ofcourse it had to be a magnolia for me :) 
I decided to do a card and here it is !
I loveeeee them! I think this image is so cute ! 
It can go for a couple or siblings !
 The challenge is pretty simple ! all you have to do is use a human type character stamp as your focal image. 
I loved this image the moment i stamped it ! its fantastic ! has a lot of scope with coloring . 
I have used promarkers for coloring. I sort of went for the Red head look for tilda and edwin. 
 Here is my floral spray. All the flowers are readymade.
I have used some butterflies and some seam binding in green to tie everything together. 
I am using cartabella papers here. Some circle spellbinders and sizzix dies. 
With the sentiment being Oh Happy Day! 
Tha card can go for any occasion !
Hope you enjoyed my card. 
Thanks for tuning in ! 
See you soon ! 


Challenges : 
 Tilda's town
 marvelous magnolia challenge
 ribbon girls (Used a blue pearl heart on the bow)

Friday, September 26, 2014

Sending you special wishes


Hello friends! I hope that you all had a lovely week! 
Friday is here already and September is still looking bright for us out here 
which is so good to see since its almost time for winter now.
I have been posting for itsy bitsy every 1st and 3rd friday of the month and this is another inspiration post for their blog. Check out their blog for more detailed info on this project.
This one is really special to me!
I kind of spent a whole evening making this simple looking card happen but it was totally worth the effort.
That is my Little darlings stamped image (Little Darlings Sweet Daisies.).
I coloured it using promarkers.

The lavender flower you see here is from Petite daises soft touch collection by itsy bitsy.
The other two flowers are handmade with cherry lynn dies and I covered all the flowers with some texture paste to give it a lovely rough look.

These butterflies are stamped and fussy cut.
I then coloured with the same shades of lilac and purple to coordinate with the whole card.
So that’s about it from me today.
I hope you enjoyed my card! 
Happy weekend
See u soon !

Challenges :
cheery lynn designs 


 Other supplies : 
  • Cardstock- Hobbycraft 
  • Design paper - Crate paper 
  • Promarkers 
  • Distress inks 
  • Black pigment ink
  • Seam binding - peacock blue (Ribbon reel)
  • Hat pins (Local)
  • Embossing enamel - Stampedenous 
  • Stamps - Sentiment (Stamping bear) Image (Little darlings sweet dasies)

Friday, September 12, 2014

Textured tag

Hello everyone ! 
This is my 3rd post of the week .... Kinda fun actually :) 
I made another tag !
Recently i won some wonderful Finnabair art extravagance texture pastes from Prima. 
I totally went crazy over them ! Love the texture and the look they have when they dry. 

So here is my tag 


Well what do u think ? 

I really enjoyed making this one it was done in about 2 hours tops. 
2 hours also because i didnt use a heat gun. 

so if you are wondering where the texture paste is 
 Its underneath all the embellishments. 
I started with inking the tag with spiced marmalade distress ink and then i sprinkled some water over it .
After it dried i used Finnabair's Art extravagance texture paste -White sand with a stencil. 
https://creativeinspirations.ca/catalog/product_info.php?cPath=129_355&products_id=5325
Photo credits -Creativeinspirations.ca & Prima Marketing
  You can see how this texture paste is drying almost clear and has that lovely sand grain effect ! 
I totally love the texture and the fact that i can see through the paste ! 
i would totally suggest this to anyone ! 
Another great thing is it has gluing properties , so if you had to add texture and then add some buttons or sparkles or something else on top of all that texture it would really stay in place when it dries. 

Here is how i pretty much constructed my Background.
 The flowers are handmade. Again i have used some texture paste on top of it to give it that rock candy look.
 I love to use Tulle to make my bows its so dreamy !!

 So thats about it from me today ! Hope that you like my work !
thank you !!! 
Hugs 
PJ 

 Challenges : 

cheery lynn designs  (Die used - gardenia strip)
scrap it girl (used stencil)
mixedmediamojo  (Used fall colors and texture paste) 

You might also like

Related Posts with Thumbnails

Popular Posts

Creative Commons License
Lightbox Creative Ideas by PJ is licensed under a Creative Commons Attribution-NonCommercial-NoDerivs 2.5 India License.